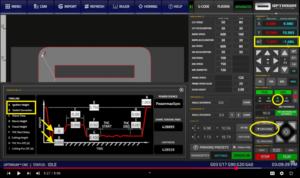
Let’s discuss the “Torch Probe” button available on the main screen of Optimum CNC plasma cutting software and how it assists the operator in locating the surface of the material being worked on. We’ll cover the floating head sensor, the arc sensor, and some plasma settings options, namely ignition height and switch correction, also known as IHC correction height.
How does the torch probe work? Essentially, the torch probe utilizes two sensors connected to the torch: the ohmic sensor and the floating head sensor. The ohmic sensor can be toggled on and off. These sensors function differently but serve the same purpose: to locate the point of contact between the torch and the working surface.
Starting with the ohmic sensor, which is usually simpler to understand, it’s directly connected to the torch. Once the torch moves down, the ohmic sensor engages as soon as the torch touches the work surface. This means there’s zero correction between the ohmic sensor and the torch itself.
The floating head sensor is the second sensor available on Optimum CNC plasma. There’s some play, meaning that once the torch goes down and touches the working surface, it requires a bit more downward motion to engage the floating head. The floating head is used when the ohmic sensor doesn’t recognize contact with the work surface, perhaps due to liquid or dirt on the material. It’s a more mechanical system, almost like a button press. This introduces a small correction value, usually set once per machine, and is configured within the IHC correction height, also called the switch correction or value B in the plasma settings.
The system moves down and detects when either the ohmic sensor or the floating head sensor is engaged. This tells the system that the current machine coordinate is the work coordinate zero. At this point, there’s no difference between the work offset, program coordinate, and machine coordinate. Once contact is made, the system recognizes that point as work zero and sets the coordinate to zero.
Next, the system moves up slightly to the ignition height. For example, if the ignition height is set to 0.06, the torch will raise to that value after zeroing. This value can be adjusted as needed.
To demonstrate, let’s run the procedure using only the ohmic sensor. We’ll toggle the sensor on and off. Raising the torch slightly and moving downward, the system detects when the torch touches the table because the ohmic sensor is on. It then raises the torch slightly after zeroing the coordinate, moving it up by the value specified in the IHC or initial height control ignition height.
Now, let’s utilize the floating head sensor. The procedure differs slightly. The torch moves downward, and at some point, the floating head sensor engages, stopping the downward motion. The torch then begins moving upward, and zeroing occurs when the floating head sensor is no longer engaged. The system adds the correction value.
Torch Probe Button Location: The Torch Probe button is located in the Work Offsets panel, the second to last panel on the right side column of the software underneath the Optimum CNC logo, above the Program Controls Section.


