Import DXF Positioning
Damien Von Sincler2025-05-06T13:58:51-07:00
Damien Von Sincler
All Articles, Import DXF cut files
CAM, cam editor, dxf, edit shapes, file preview, file selection, folder preview, import, import dxf, import project, nest, nesting shapes, optimum, optimumcnc, scale, select file, select folder, shapes library
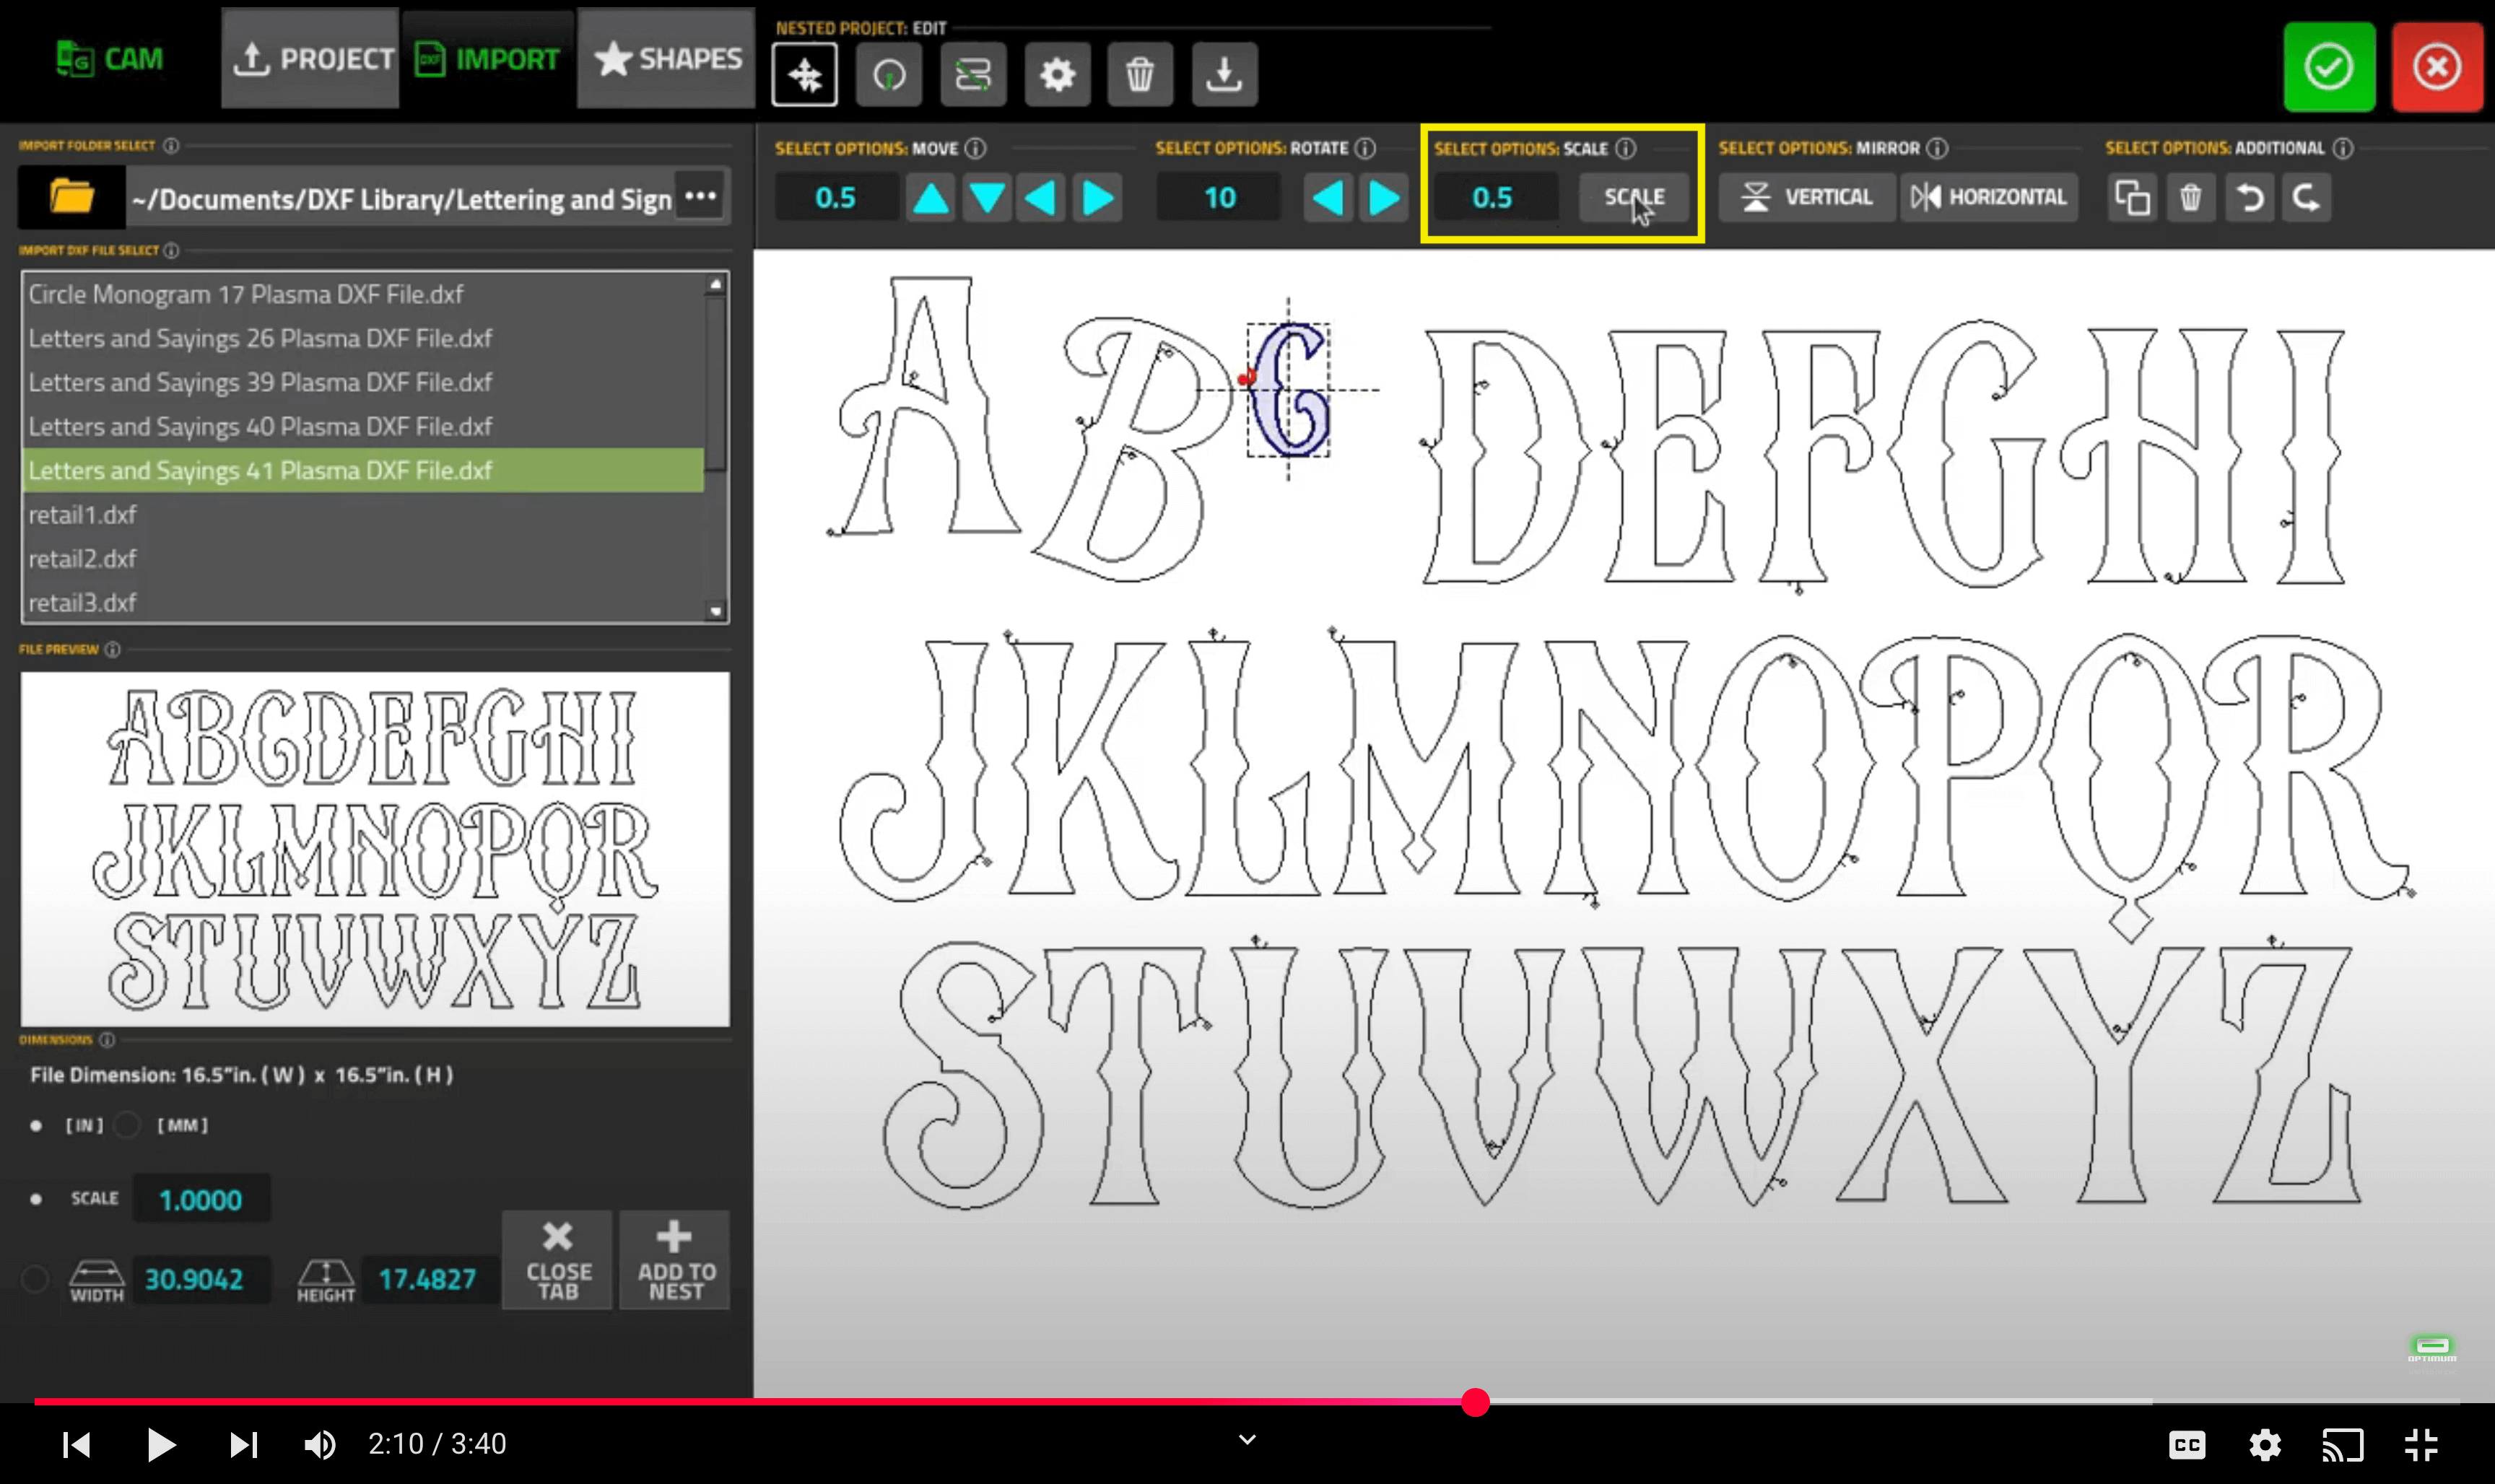
Let’s talk about the process of importing and editing a DXF file into Optimum CNC plasma software. This is part two of the Import DXF series that deals with the positioning of the DXF file within the nested project. We’ve already gone over the project object, import, and shapes buttons in our previous video. Let us now select a file, for instance this letters file right here, and add it to the project.
Require assistance? Tap here.
Press Play & have this next section be read outloud.
Next, to position these letters within the project, we will click the positioning button in the top ribbon and this foldout ribbon will appear. When we’re clicking on a file, we can then move it with our mouse, or alternatively we can select the value by which we are going to move — let’s say 2 inches — and then press these buttons to adjust the positioning of this file. Let’s say I move it by some small amount, five-hundredths of an inch, and move this a little bit up and to the left.
Next, we can also rotate a file after we have selected a particular shape — for instance, this letter B. We can select an angle by which we’re going to be rotating it, let’s say 10°, and then rotate it and reposition it if needed.
We can also scale a file — for instance, this letter C — let’s say we will scale it down to be half the size it currently is. After we have selected the factor here, press the scale button, and the letter will become smaller.
We can also mirror the letter. For instance, let’s vertically mirror this letter D. As you can see, it flips. Let’s horizontally mirror it and vertically mirror this letter F so we have a clear view of the edits that we’re currently making to the file.
We also have some additional options here, among them is the option to copy a file — so for instance, let’s copy this letter Z. We can delete a selected file or a group of files — let’s say we want to delete these four letters — and then we have the options to undo and redo our latest edits.
After we’re done with the positioning, we can either edit the rest of these settings — which will be described in subsequent videos — or we can import the file by pressing the confirm button at the top. Once the file has imported, you can see how all of these edits look within the visualization screen of Optimum CNC software.
Press Play & have this next section be read outloud.
Definitions for the
Nested Project Toolbar
Move: The “Move” tool allows you to move a part/shape/contour for a selected distance. The Move tool has an input field to enter the moving distance in inches. You will find four buttons Up, Down, Left, Right.
Rotate: The “Rotate” tool allows you to move a part/shape/contour for a selected amount of degrees. The Rotate tool has an input field to enter the rotating angle in degrees. The Rotate tool allows for positive and negative degrees. You will find two arrow buttons Left and Right.
Scale: The “Scale” tool allows you to increase or decrease the size of a part/shape/contour for a selected amount of degrees. The Scale tool has an input field to enter the scale size ratio for inches with positive number for enlarge and negative number for shrinking. To scale up or down an object, select the part/shape/contour, fill in the scale size in inches, then tap on the “scale” button to enlarge or shrink the object.
Mirror Vertical ( ⧖ ): The “Vertical” Mirror feature allows the user to select an object and then tap the “Vertical” button to flip the object in a mirror-like fashion keeping the “vertical center” as the main flipping axis.
Mirror Horizontal ( ⧒ ): The “Horizontal” Mirror feature allows the user to select an object and then tap the “Horizontal” button to flip the object in a mirror-like fashion keeping the “horizontal center” as the main flipping axis.
Duplicate ( ⧉ ): The “Duplicate” feature allows the user to select an object and then tap the button with 2 offset squares, (icon representing the copying of original) to produce a duplicate of the selected part/shape/contour.
Delete (Trash can 🗑 ): Tapping on the Delete button, with the trashcan icon, will Import DXF File Select area displays all the available files that can be imported from within the chosen folder.
Undo ( curved arrow left ↩ ): If you should accidentally delete a object or perform an unexpected or undesired action, tap on the UNDO button and the action will be reversed. If you desire “CTRL + Z” on your keyboard also performs the same action.
Redo ( curved arrow right ↪ ): If you’ve delete an object or performed an undesired action, tap on the REDO button and the action will be returned.
Import DXF Location: The “Import DXF Positioning” buttons can be found on the navigational bar across the top when you tap on “CAM”. Tap on the “Crosshair icon” under the section labeled as “Nested Project: Edit”.
MANUAL: For more information on “Import DXF Positioning”, review your Optimum CNC Manual User Guide under “Editing the imported files” section, PDF available in your Owners Access Link.
Optimum CNC Software Screenshots: Tap on Images to Enlarge